Archive for February, 2009

Sony MicroVault Click

DSC07065

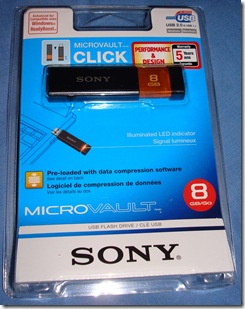
After loosing my 4 GB drive months ago, and becoming sick of my 1 GB backup, I went in search of a new flash drive. 8 GB being the smallest I would have liked, also hoping to keep this for many years to come, I did not want to be stuck with an ugly cheap mess. So what I was looking for was 8 to 16 GB, less than £20 and something which looks nice.

A cheap option is the play.com branded range, with 8 GB for £9.49 and 16 GB for £16.99, which is great if you don’t care about looks and don’t want to care about loss. But I settled for Sony’s nice-looking and gimmicky click range. I ended up paying around £20 (with postage) for the 8 GB from Amazon after Play let me down (after more than a week had passed and no dispatch to be seen). So a quick review of it is that its nice looking and reliable. The included compression software could be genuinely useful, it actually does decrease file size, but the software requires administrator privileges. So it is rendered obsolete for college use, how aggravating.

But the glorious gimmicky side of these flash drives is the clicking, it clicks just like a clicky pen, with the USB connector showing and hiding. But it is not just any click, it is the best, most satisfying click known to pen and flash drive alike! When you click it, you really just have to click it again, then again, then again and again.

So all in all it is a quality flash drive, certainly worth the music and I have no regrets after buying it.

 

DSC07060

Leave a comment »

Tether iPhone to Computer

This is a very simple procedure which is only possible with a Jailbroken iPhone. So if you do not have a Jailbroken iPhone then see my post on how to Jailbreak an iPhone with 2.2.1 firmware (look elsewhere for other firmwares). Before you start I should say the software is nagware (i.e. asks for registration once in a while but registration is not needed)

I will be using a 2.2.1 Jailbroken iPhone and a windows Vista computer, this also works on Mac. So lets get started:

  1. On your iPhone open up Cydia
  2. Search for “Modem” and install “iPhoneModem by Addition”
  3. Download and install  the helper application from http://www.iphonemodem.com/ (Windows or Macintosh)
  4. Open iPhoneModem on your computer and click connect.
  5. On your iPhone go to your wifi settings and connect to “iPhoneModem”
  6. Open up iPhoneModem (just called “Modem” on the list of apps)
  7. Wait for both devices to complete the connection.
  8. Then you should be good to go.

Just so you know this seriously drains battery life, so I suggest you connect your iPhone to your computer with the USB cable to reduce the battery use. And that is it, now you can get the internet on your laptop or netbook wherever you can get the internet on your iPhone (this works great on my Acer Aspire One)

Leave a comment »

Jailbreak iPhone 2.2.1 (QuickPwn)

Ever since the AppStore was introduced I gave up the life of Jailbreaking. Mainly to remove the annoying complexity of upgrading to new firmwares apple released. But I have finally returned to get Modem. The tipping point was when I bought my netbook. I found myself at college wondering why I had not been tethering them since the day I bought them.

So on my week off from college the first task on my list was “Jailbreak iPhone”. The first time I attempted this method I messed it up and had to restore in iTunes. But the second time I was successful and saw it was very easy as long as you followed the instructions well.

If you have force restored your iPhone at any time this method will be familiar. For those who have never Jailbroken and iPhone or iPod Touch, be aware that you may harm your device if you do things wrong, and this is in no way my responsibility. Also be ready to press buttons on your device when the program tells you to.

So lets get started. It looks like there are a lot of steps, but there are only a few and I have just been thorough with my descriptions. I suggest reading all the steps before attempting this so you know what you are getting into and so you can decide weather or not to proceed:

  1. Make sure you are on the latest firmware (2.2.1). If you are unsure of how to check follow the following taps. Settings → General → About. Here you should see “Version: 2.2.1 (5H11)”. If you are not on the latest firmware upgrade using iTunes.
  2. If your device is plugged in then remove it.
  3. Go to http://quickpwn2-2-1.googlecode.com/files/QuickPwn-225-2.zip. This will start the download of the QuickPwn software (kindly developed by the iPhone Dev Team). When the download has finished extract the files and open the QuickPwn.exe file.
  4. Connect your device tot he computer and click the arrow when it turns blue.
  5. Wait for the green tick to appear on the picture of the iPhone then click the arrow.
  6. Here I recommend you keep “Add Cydia” and “Add Installer” checked, it is your choice to change boot logo or not. When you have checked what you want click the blue arrow.
  7. Double check your device is connected. Here is where you need to be ready to use your fingers.
  8. Before you click the arrow to continue hold your device so you have your thumb on the Home button and a finger on the Sleep/Wake button. When you click the arrow you will be given onscreen instructions detailing which buttons to press when and for how long. Be sure to follow the instructions as accurately as you can because it is very easy to get it wrong.
  9. Click the arrow and follow the instructions.
  10. Release the Home button when the green progress bar is full.
  11. If you have done this correctly your device should have a white screen. Then a Green arrow, a hard drive and a message saying “Downloading Jailbreak Data…” will appear on your device. This screen will be shown until the green progress bar on your computer is full.
  12. Finally your device will show a picture of a running pineapple with a blue status bar below it.
  13. Now you can leave your device until the process has finished and you can see the lock screen on your device.

If you mess up with this it is not my fault. Fixes I recommend are then restoring your device in iTunes, force restoring your device, trying the Jailbreak process again and finally look around the internet for a fix. I would be surprised if there is not a solution out there.

So now, supposing you have been successful, your device has two new icons. Cydia and Installer are the applications from which you download the apps now available to you. So go now and play, just be sure to read application descriptions carefully for warnings which may be relevant to you.

Comments (7) »